Navigation Links
Writing and Publishing a Simple Javascript Module to Node Package Manager
Step#1: Let's create a new Github repo
If you don't already have a github account, Create one (its free) and after that Let's open https://github.com/new to create a new repository.
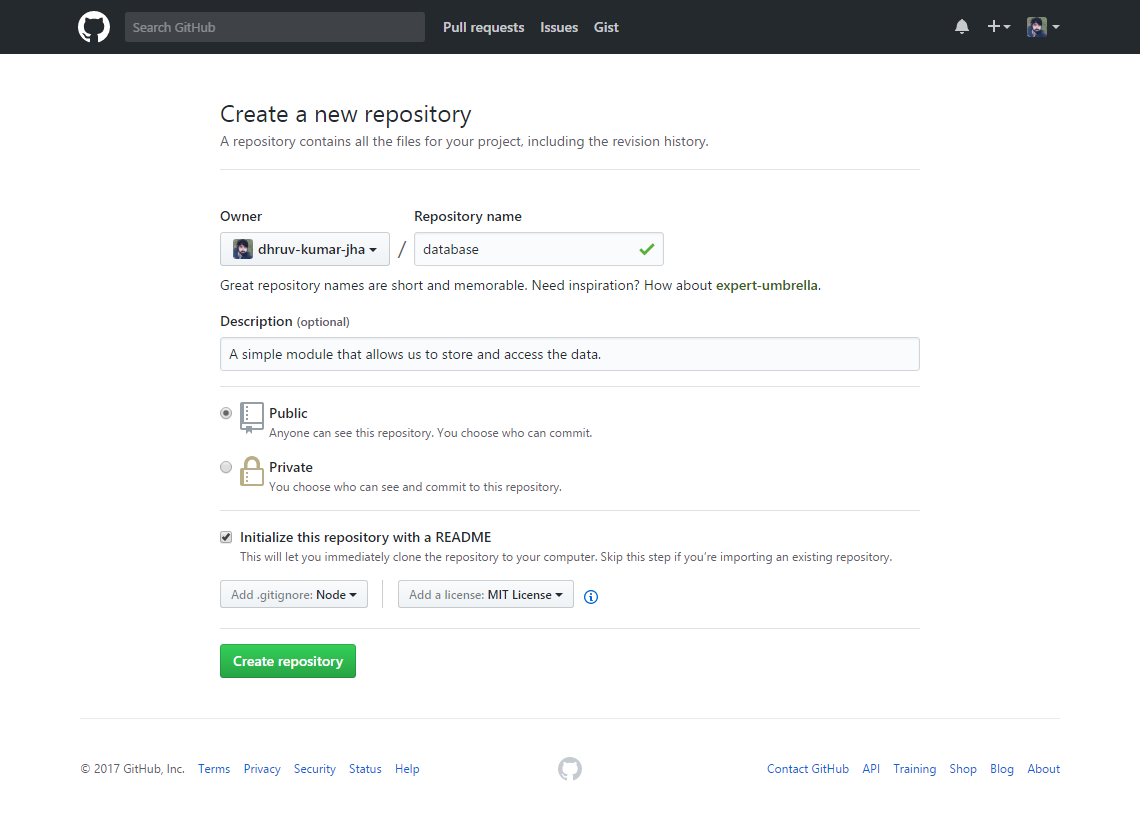
Go ahead and enter a name and description for your repository. Since we want others to make use of this module as well, We will set it to Public.
We will also initialize a README file, add .gitignore file and MIT License
After entering all the details click on Create repository button. Now you will have a screen that looks like this.
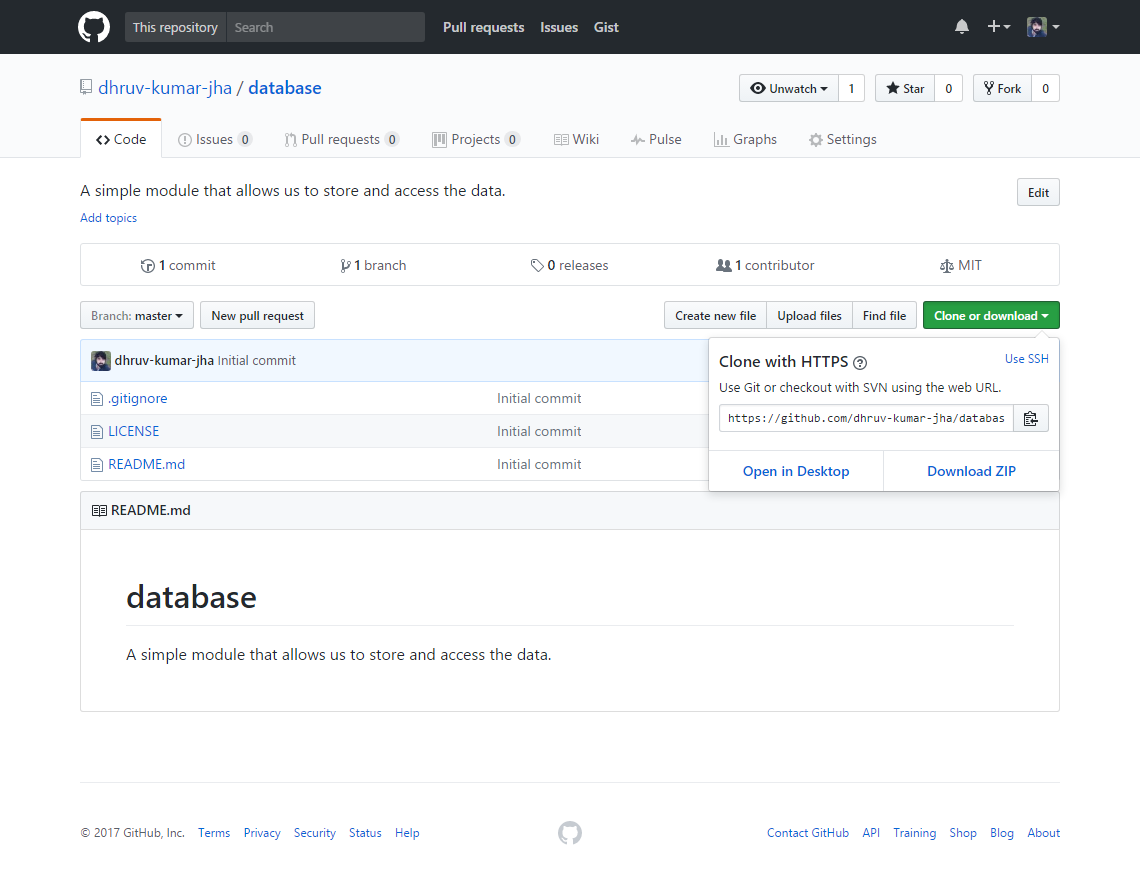
Click on Clone or download button and copy the repository url from there, In my case it's https://github.com/dhruv-kumar-jha/database.git
Step#2: Let's clone the repo we created and start working on the module locally.
I assume you already have node installed, If you don't please install it by going to https://nodejs.org/en/ and follow the instructions there.
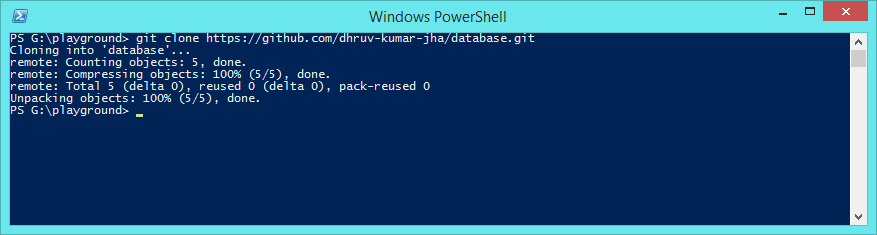
Open the directory where you want to clone the repo, and in your terminal/shell type git clone REPOSITORY_URL, In this case git clone https://github.com/dhruv-kumar-jha/database.git
Now cd/go into that directory and in terminal run npm init, It will ask you few questions like project name, description, version, author.., Enter those information or just hit enter and the default will be used.
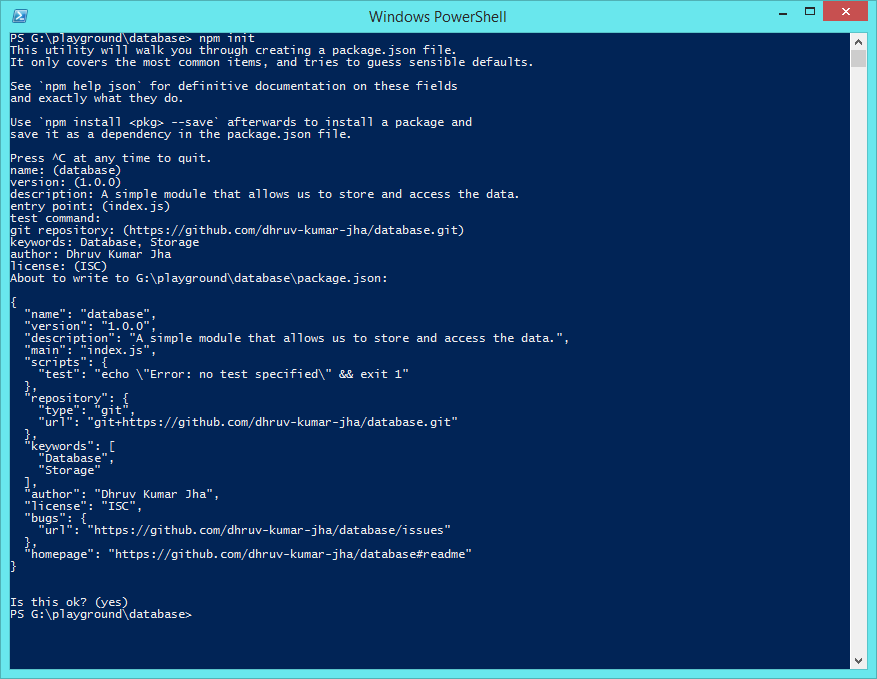
For everything else you can use the default, by hitting enter key.
This will create a new package.json file which will store all the information regarding our module, Like its dependencies, etc.
Now that the repository has been cloned locally, And we have initialized npm, Let's start working on the module.
Step#3: Directory Structure
It's very important that we structure the project in right way, This ofcourse depends on individuals and their preferred styles.
Anyways it's always best to follow your common sense., We want to keep things simple, well structured, and easy to work with.
Let's create a new directory named src and we will place all of our module code within this directory.
Let's create a new file named database.js within our src directory., And index.js within our project/module root directory
Now, The directory structure of our module will look like this.
Step#4: Coding our Module, So it functions as we have described.
Let's open index.js file first and add this code.
'use strict';

module.exports = require('./src/database');
We're just requiring the module from our src directory and exporting it, If you have used different directory or file name, please use that instead of src/database.js
Now, Let's open src/database.js file start writing some code in it.
'use strict';

// lets initialize empty store here, our store will be an object.
const store = {};

// methods for storing and accessing the data.
const Databse = {

}

// let's export our module.
module.exports = Databse;
Now, Let's add all the helper/api methods which others can make use of when using this module.
'use strict';

// lets initialize empty store here, our store will be an object.
const store = {};

// methods for storing and accessing the data.
const Databse = {

	// this will return the entire store.
	all() {
	},

	// this will add new record in the store
	create( key, value ) {
	},

	// this will update existing record in store
	update( key, value ) {
	},

	// this will either create or update a record in store
	save( key, value ) {
	},

	// this will find and return records based on the parameters provided.
	find( key ) {
	},

	// this will delete a record from store.
	delete( key ) {
	},

};

// let's export our module.
module.exports = Databse;
Let's write the code to make this module actually work.
'use strict';

// lets initialize empty store here, our store will be an object.
const store = {};

// methods for storing and accessing the data.
const Databse = {

	// this will return the entire store.
	all() {
		return store;
	},

	// this will add new record in the store
	create( key, value ) {
		return store[key] = value;
	},

	// this will update existing record in store
	update( key, value ) {
		if ( typeof store[key] === 'object' ) {
			const updated = Object.assign( {}, store[key] || {}, value );
			return store[key] = updated;
		}
		return store[key] = value;
	},

	// this will either create or update a record in store
	save( key, value ) {
		if ( store[key] ) {
			return Databse.update(key, value);
		} else {
			return Databse.create(key, value);
		}
	},

	// this will find and return records based on the parameters provided.
	find( key ) {
		return store[key];
	},

	// this will delete a record from store.
	delete( key, path=null ) {
		if ( path ) {
			return delete store[key][path];
		}
		return delete store[key];
	},

};

// let's export our module.
module.exports = Databse;
As you can see find method doesn't do much at the moment, this just finds and returns the key with same name from the store object.
This is fine for this tutorial, However I recommend you checkout https://lodash.com/ and implement some of its helper methods to make this module more powerful.
Step#5: Testing
Let's setup testing by installing two node modules, mocha and chai
To install a npm module, you just run npm install MODULE_NAME in the terminal, You can install multiple modules by running npm install MODULE_ONE MODULE_TWO MODULE_THREE.
Since testing is used in development and not in production, We will install the modules using --save-devflag.
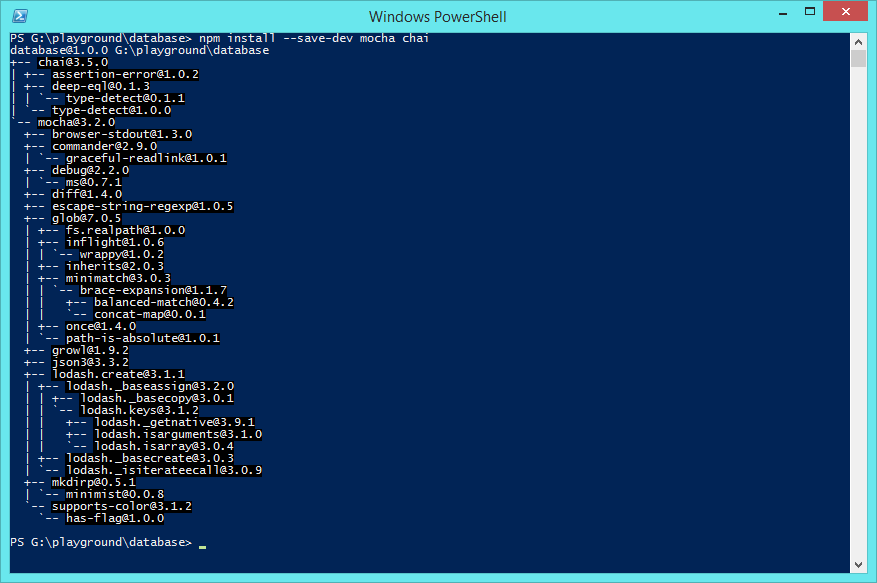
Lets install the modules by running npm install --save-dev mocha chai., This will install the latest versions of these modules.
Let's create a new directory named test and a new file in that directory named index.js
Let's also edit our package.json file, Here you can see there's an scripts object with a key named test, Change its value to mocha. This will allow us to run tests easily.
By default mocha will run tests from /test directory. So we don't need to specify the tets directory.
...
  "main": "index.js",
  "scripts": {
    "test": "mocha"
  },
...
Now its time to write some tests, Open test/index.js file and add this code.
This will check whether on not all of the methods we specified on the object/module exists or not.
'use strict';

const Database = require('../src/database');
const chai = require('chai');
const expect = chai.expect;

const store = Database.all();


// let's make sure all of these methods exists/are defined in our module object.
describe('Database', () => {

	it( "should have 'all' method", () => {
		expect(Database).to.include.keys('all');
	});

	it( "should have 'create' method", () => {
		expect(Database).to.include.keys('create');
	});

	it( "should have 'update' method", () => {
		expect(Database).to.include.keys('update');
	});

	it( "should have 'save' method", () => {
		expect(Database).to.include.keys('save');
	});

	it( "should have 'find' method", () => {
		expect(Database).to.include.keys('find');
	});

	it( "should have 'delete' method", () => {
		expect(Database).to.include.keys('delete');
	});

});
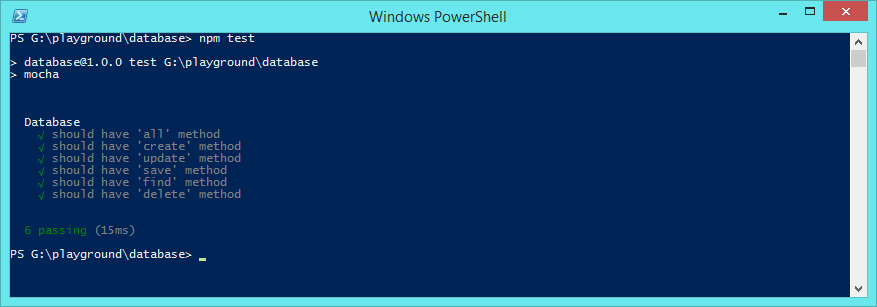
Run the test by doing npm run test or npm test and you should see all tests passing.
Perfect. Let's add more tests to make sure all of our methods are working as expected.
You can write more tests on your own that checks and validates/verifies other features or you can write a test that fails (if you want to).
'use strict';

const Database = require('../src/database');
const chai = require('chai');
const expect = chai.expect;

const store = Database.all();

// let's make sure all of these methods exists/are defined in our module object.
describe('Database', () => {

	it( "should have 'all' method", () => {
		expect(Database).to.include.keys('all');
	});

	it( "should have 'create' method", () => {
		expect(Database).to.include.keys('create');
	});

	it( "should have 'update' method", () => {
		expect(Database).to.include.keys('update');
	});

	it( "should have 'save' method", () => {
		expect(Database).to.include.keys('save');
	});

	it( "should have 'find' method", () => {
		expect(Database).to.include.keys('find');
	});

	it( "should have 'delete' method", () => {
		expect(Database).to.include.keys('delete');
	});

});


describe('Database.all', () => {

	it( 'should be an object', () => {
		expect(store).to.be.an('object');
	});

	it( 'should be empty when initialized', () => {
		expect(store).to.deep.equal({});
	});

});


describe('Database.create', () => {

	it( "should add a key 'name' in store", () => {
		Database.create('name','John Doe');
		expect(store).to.include.keys('name');
	});

});


describe('Database.update', () => {

	it( "should update the value of the key 'name' in store", () => {
		const value = Database.update('name', 'Johnny Bravo');
		expect(value).not.to.be.null;
	});

	it( "key 'name' show match the updated value", () => {
		const value = Database.find('name');
		expect(value).to.not.equal('John Doe');
		expect(value).to.equal('Johnny Bravo');
	});

});


describe('Database.save', () => {

	it( "should add a key 'email' in store", () => {
		Database.save('email','john.doe@gmail.com');
		expect(store).to.include.keys('email');
	});

	it( "should update the value of the key 'name' in store", () => {
		const value = Database.save('name', 'Jane Smith');
		expect(value).to.not.equal('Johnny Bravo');
		expect(value).to.equal('Jane Smith');
	});

});


describe('Database.find', () => {

	it( "should return the value of key 'name' from store", () => {
		const value = Database.find('name');
		expect(value).not.to.be.null;
	});

	it( "should be equal to the value that was set", () => {
		const value = Database.find('name');
		expect(value).to.be.a('string');
		expect(value).to.equal('Jane Smith');
	});

});


describe('Database.delete', () => {

	it( "should delete the key 'name' from store", () => {
		const value = Database.delete('name');
		expect(store).to.not.include.keys('name');
	});

	it( "the value of deleted key 'name' should be undefined", () => {
		const value = Database.find('name');
		expect(value).to.be.an('undefined');
	});

});
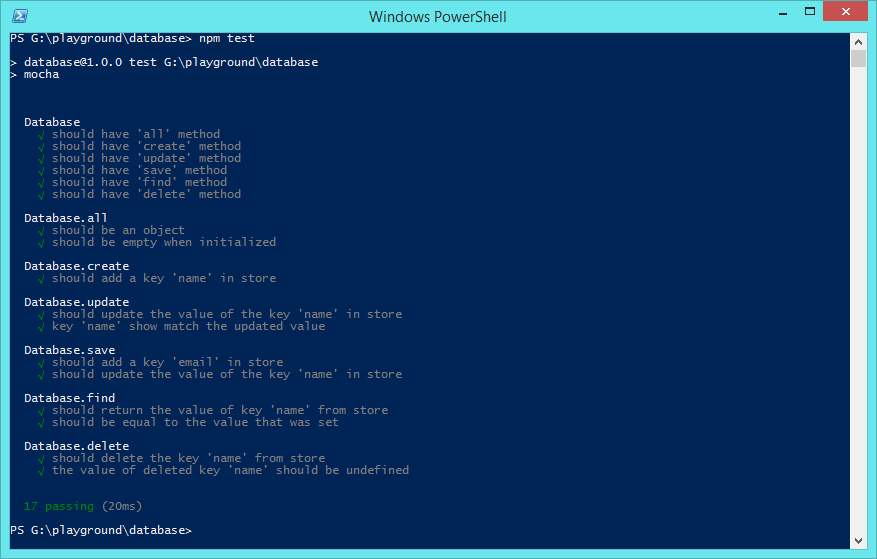
Run the test again by doing npm test and you should see all 17 tests passing.
Step#6: Commit our code and Push to Github
Open terminal and write command git status, You should see all the new files that we created (these files are not being tracked by git yet), Let's add all these files by running git add -A. Now lets run git status again and we can see all the files have been added (meaning these files are now being tracked.)
Let's commit our code by running git commit -m "Awesome Database Module".
Let's push the updated code/files to Github by running git push (You might be asked to enter your Github username and password, Just enter them.)
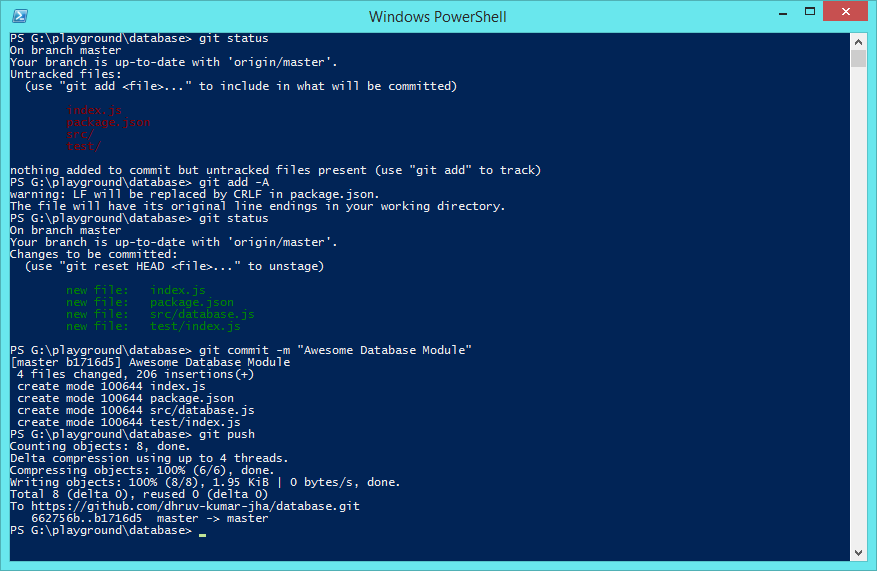
Now you can open your Github and see the updated code there. https://github.com/dhruv-kumar-jha/database
Step#7: Publishing the Module on NPM (npmjs.com)
Open https://www.npmjs.com, Create a new account if you don't already have one, And then Login into your account.
Open terminal in your project root directory and type npm login, This will prompt you to enter your npmjs.com email address and password., Please enter the correct information and you will be logged it.
Incase you want to logout, just run command npm logout and you will be logged out. You can see all the commands by running npm

Now all you have to do is run npm publish
Do Note: If another package with same name already exists in NPM Repository you will receive an error, To fix this change the name of your module in package.json file and run npm publish again.
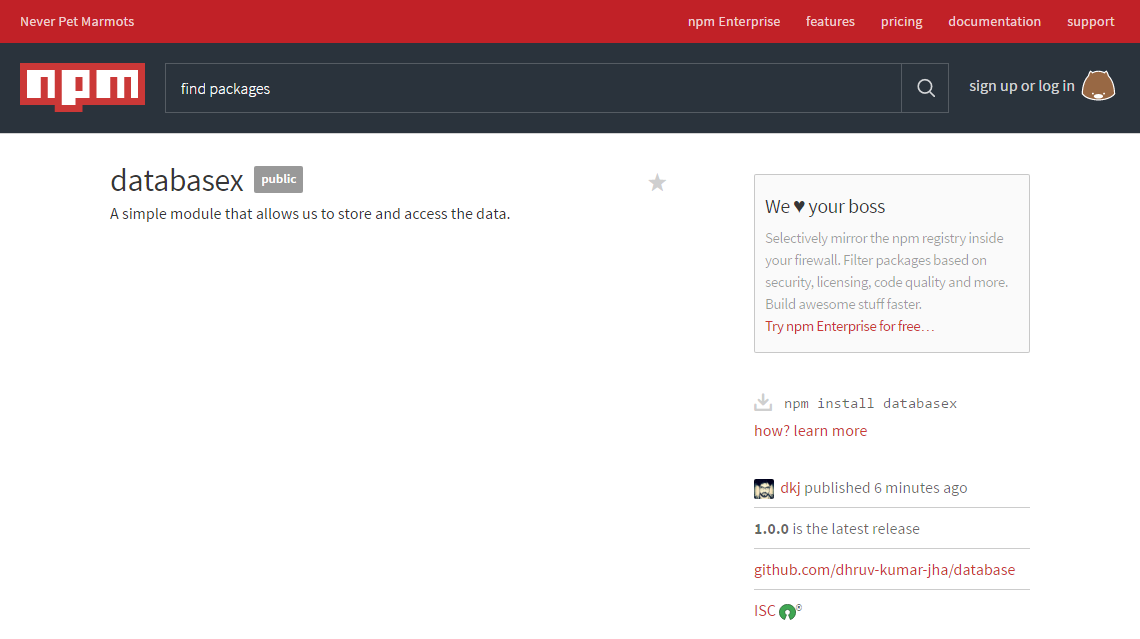
I faced the same issue and had to change the module name, I changed it to databasex
Don't forget to commit your changes and pushing your code to Github.

Congratulations. You did it.
Now you can access the module by going to https://www.npmjs.com/package/MODULE_NAME, In this case https://www.npmjs.com/package/databasex
Now you can add instructions on how to use install and use this module in your README.md file so others can go through it and start using your module.
And always remeber to commit your changes, push it to Github and when you're ready for a new update, publish the package again.. and change the version in your package.json file.