Navigation Links
Introduction To Creating React Components And Publishing Them To NPM
Step#1: Project Setup
We will setup our project in such a way that we will write the code using latest javascript features ECMAScript 6 and later compile the code to ECMAScript 5 using a build process.
Let's begin by creating a new GitHub Repository by going to https://github.com/new
Enter the repository name, description, select Initialize this repository with a README, For .gitignore file, select Node and for License select MIT
After entering all the details, Click on Create repository. You will be redirected to your newly created repo, In this case it's https://github.com/dhruv-kumar-jha/code-highlight
Now, let's clone this repository to our local system by running the command in terminal git clone https://github.com/dhruv-kumar-jha/code-highlight.git
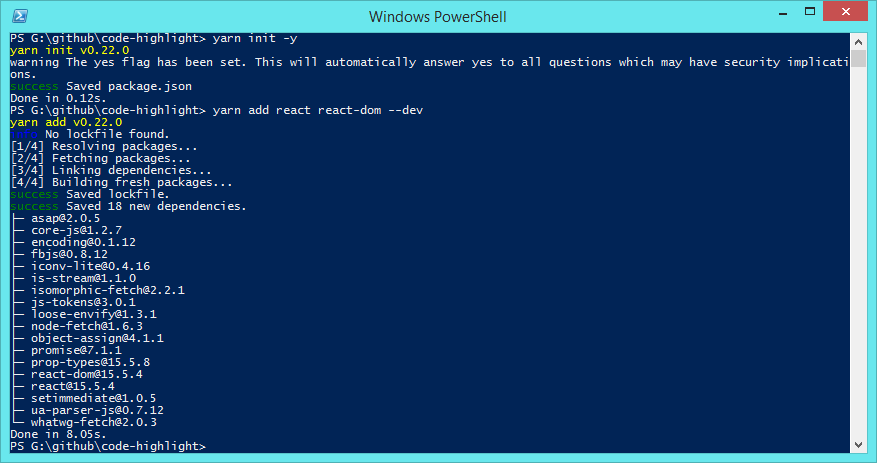
You will see a new directory with the contents of the repo, Run the command yarn init -y to initialize a new package.json file with default options.
Let's install our primary dependencies React and React Dom, run the command yarn add react react-dom --dev. This will install our dependencies and add it in devDependencies section within our package.json file.
Now let's install all the dependencies that will allow us to compile our code to ECMAScript 5
Run the command yarn add babel-core babel-loader babel-preset-env babel-preset-react cross-env webpack --dev, This will install the remaining dependencies.
Let's create new files and directories as follow, webpack.config.js, .babelrc, src/index.js, lib/style.css
Step#2: What Are We Building?
Syntax Highlighter component.There are already many syntax highlighter components built using react, but let's build one anyways., You can easily replicate these techniques with whatever component you decide to build.
WHY? because the code i shared on this website looked boring and so I decided to build a simple syntax highlighter and make it as a tutorial.
We wont be doing the heavy work, there are already many great Syntax Highlighters available for us to use, The choices are many, I decided to go with https://github.com/isagalaev/highlight.js/ although this module doesn't support line numbers (this doesn't matter to me at the moment).
Few others are https://github.com/PrismJS/prism, https://github.com/google/code-prettify and many more., Just Google.
Lets quickly install this package by running yarn add highlight.js --dev, This will install the module and add it in our dev dependencies.
Step#3: Writing The Component
Open src/index.js and add this code
'use strict';

import React from 'react';
import ReactDOM from 'react-dom';
import hljs from 'highlight.js';


class CodeHighlight extends React.Component {

	constructor(props) {
		super(props);
		this.state = {
			// empty state, we might add something in future
		};
	}

	static get defaultProps() {
		return {
			language: 'javascript',
			tab: '    ', // 4 spaces
			title: '',
			description: '',
			classes: {
				title: '',
				description: '',
				pre: '',
				code: '',
			},
		}
	}

	componentDidMount() {
		this.highlightCode();
	}

	componentDidUpdate(prevProps, prevState) {
		this.highlightCode();
	}

	highlightCode() {
		hljs.configure({
			tabReplace: this.props.tab,
		});
		hljs.highlightBlock(this.refs.code);
	}


	render() {

		return(
			<div className={ this.props.className || 'code-highlight' }>

				{ this.props.title &&
					<div className={ this.props.classes.title || 'title' }>
						{ this.props.title }
					</div>
				}

				{ this.props.description &&
					<div className={ this.props.classes.description || 'description' }>{ this.props.description }</div>
				}

				<pre className={`${this.props.language || '' } ${ this.props.classes.pre || '' } `} ref="code">
				<code className={ this.props.classes.code || '' }>
					{ this.props.children }
				</code>
				</pre>

			</div>
		)
	}

}

export default CodeHighlight;
So what's going on with our Component code?
First we import React, ReactDOM and hljs i..e highlight.js and we define our component.
In our component we have defined static get defaultProps, This allows us to setup some default values for our Component API, For now the default values are empty strings.
Our Component API simply refers to the configurations and customizations we want to allow our users to make.
In this component, Users can specify language of the code, title, description, classes (which is an object).
If you want to offer different configurations and customizations for your components, Please don't forget to specify the default values and make sure the component will work even if user decides to not configure it.
Our componentDidMount and componentDidUpdate lifecycle methods call highlightCode method.
highlightCode method just calls hljs.highlightBlock(this.refs.code); where this.refs.code refers to the block of code being highlighted (our component itself) and hljs.highlightBlock calls the highlightBlock method provided by highlight.js module.
hljs.configure method allows us to configure highlight.js, We're just replacing tabs with 4 empty spaces by default.
And in render method we're just creating few div and pre tags with conditional classNames and conditionally displaying title and description if specified.
That's it for our component code, Our component sould work now. Anyways lets edit lib/style.css to add some styles for our Component.
/**
* Code Highlight
* stylesheet
*/
.code-highlight {
font-family: Monaco, Consolas, "Andale Mono", "DejaVu Sans Mono", monospace !important;
overflow: auto;
}
.code-highlight .title {
font-family: Monaco, Consolas, "Andale Mono", "DejaVu Sans Mono", monospace !important;
color: #000;
font-weight: 400;
font-size: 24px;
line-height: 24px;
}
.code-highlight .description {
font-family: Arial, Tahoma, sans-serif;
color: #999;
font-size: 15px;
line-height: 18px;
margin-top: 5px;
}
.code-highlight pre {
padding: 10px;
overflow: auto;
word-break: normal;
word-wrap: normal;
margin: 20px 0 !important;
white-space: pre-wrap;
border: 1px solid rgba(0,0,0,0.1);
background: transparent;
border-radius: 3px;
}
.code-highlight pre code {
white-space: pre;
font-size: 16px;
line-height: 18px;
}
Step#4: Compiling the Component using Webpack
ECMAScript 6. Webpack will compile our code to ECMAScript 5Open webpack.config.js and add this code
const webpack = require('webpack');
const path = require('path');

const BUILD_DIR = path.resolve(__dirname, 'lib');
const APP_DIR = path.resolve(__dirname, 'src');

const WebpackConfig = {

	entry: APP_DIR + '/index.js',

	output: {
		path: BUILD_DIR,
		filename: 'index.js',
		libraryTarget: 'umd',
		library: 'CodeHighlight'
	},

	module: {
		rules: [
			{
				loader: 'babel-loader',
				test: /.js$/,
				exclude: /node_modules/,
				include : APP_DIR,
				options: {
					presets: [ 'env', 'react' ]
				}
			}
		],
	},

}


// webpack production config.
if ( process.env.NODE_ENV === 'production' ) {

	WebpackConfig.externals = {
		'react': 'react',
		'react-dom': 'react-dom',
		'highlight.js': 'highlight.js'
	};

	WebpackConfig.plugins = [
		new webpack.optimize.AggressiveMergingPlugin(),
		new webpack.optimize.UglifyJsPlugin({
			beautify: false,
			mangle: {
				screw_ie8: true,
			},
			compress: {
				warnings: false,
				screw_ie8: true
			},
			comments: false
		}),
	];

}


module.exports = WebpackConfig;
What we've specfied in our webpack configuration is
Our entry file is located in src/index.js directory and we want our build file to be created in lib directory with it's filename as index.js
And then the usual webpack stuff, If you know, If you don't this will be covered in later tutorials.
Also we're checking if we're in production mode, If yes we're minifying all the code.
We're also saying to the webpack that don't include react, react-dom and highlight.js libraries, As react will be already installed by the user who will use our component and also we want our users to install highlight.js themselves.. Although we could install it as a dependency as well.
Also let's edit our .babelrc file and add this code
{
	"presets" : [ "env", "react" ]
}
Now let's edit our package.json file and add new key named peerDependency and also add a scripts objects with few scripts that will make it lot easier to build and package our code.
{
  "name": "code-highlight",
  "version": "1.0.0",
  "main": "lib/index.js",
  "scripts": {
    "watch": "cross-env NODE_ENV=development webpack -w",
    "build:dev": "cross-env NODE_ENV=development webpack",
    "build:production": "cross-env NODE_ENV=production webpack -p"
  },
  "keywords": [
    "Code Highlighter",
    "Syntax Highlighter",
    "Highlight",
    "highlight.js"
  ],
  "repository": "https://github.com/dhruv-kumar-jha/code-highlight.git",
  "author": "Dhruv Kumar Jha <dhruv@dhruvkumarjha.com>",
  "license": "MIT",
  "peerDependency": {
    "highlight.js": "^9.11.0",
    "react": "^15.5.4",
    "react-dom": "^15.5.4"
  },
  "devDependencies": {
    "babel-core": "^6.24.1",
    "babel-loader": "^7.0.0",
    "babel-preset-env": "^1.4.0",
    "babel-preset-react": "^6.24.1",
    "cross-env": "^4.0.0",
    "highlight.js": "^9.11.0",
    "react": "^15.5.4",
    "react-dom": "^15.5.4",
    "webpack": "^2.4.1"
  }
}
I have used cross-env package as this sets up the ENV variables for all Operating Systems correctly.
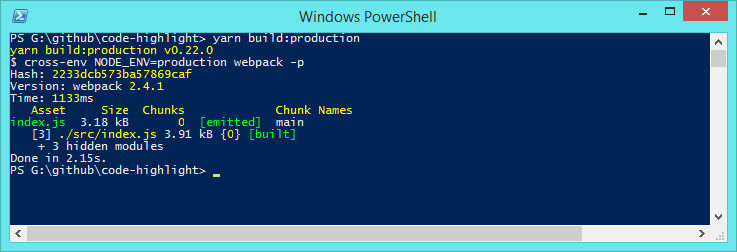
Now run the command yarn build:production and this will create a new file named index.js in lib directory.
Step#5: Final Touches
README file and also create a .npmignore file.Since we will be publishing our Component to npmjs.org, It will be best if we only provide the files + directories required.
Let's create a new file named .npmignore and add this code in it, This will tell npm to ignore certain files and directories.
# npmignore
node_modules
src
webpack.config.js
.babelrc
.gitignore
yarn.lock
Let's also edit our README.md file and add some instructions for users on how to use this component.
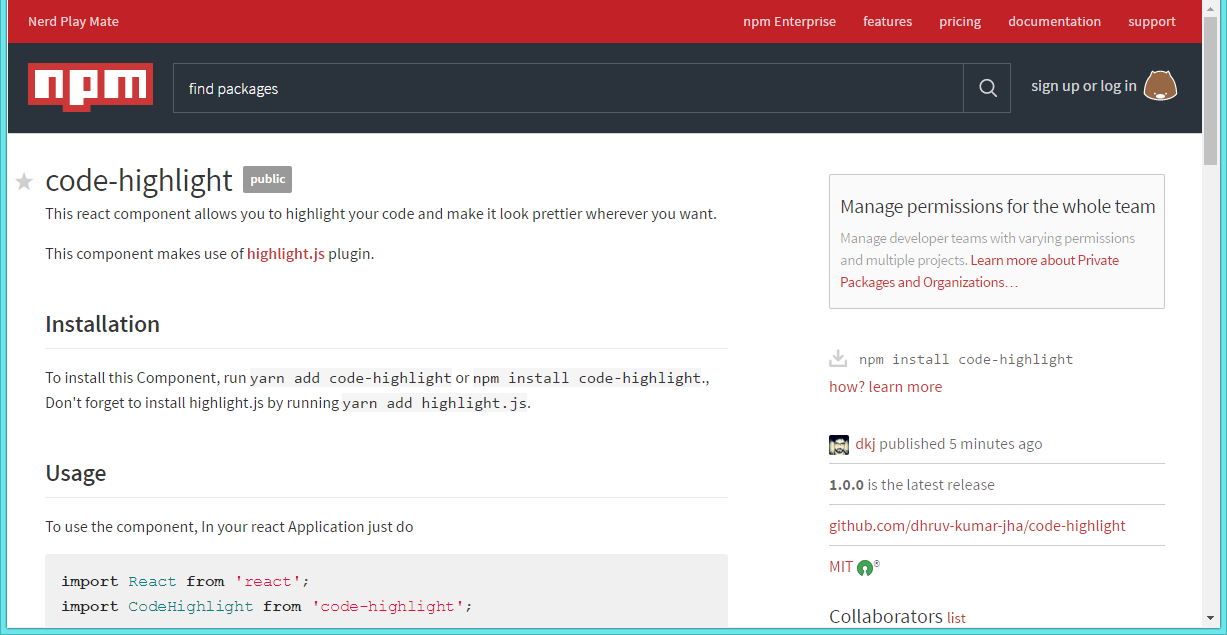
# Code Highlight

This react component allows you to highlight your code and make it look prettier wherever you want.

This component makes use of [highlight.js](https://github.com/isagalaev/highlight.js/) plugin.


## Installation

To install this Component, run `yarn add code-highlight` or `npm install code-highlight`., Don't forget to install highlight.js by running `yarn add highlight.js`.


## Usage

To use the component, In your react Application just do

```javascript
import React from 'react';
import CodeHighlight from 'code-highlight';

// import all the styles
import "code-highlight/lib/style.css";
import "highlight.js/styles/xcode.css";


const MyComponent = (props) => {

	return (
		<CodeHighlight
			language="javascript"
			title="Hello World in Javascript"
			description="This code will log hello world in the console."
		>
			{`
            	console.log("Hello World");
            `}
		</CodeHighlight>
	)

}

export default MyComponent;


```

You can also provide additional configuration like

```javascript
<CodeHighlight
	language="" // default: javascript
	title="" // if any
	description="" // if any
    tab="" // what do you want the tab in your code to be replaced with?, default: 4 spaces
    classes={{
    	title: '', // class name for the title
        description: '', // class name for description
        pre: '', // class name for pre tag
        code: '', // class name for code tag
    }}
    className="" // if specified this will replace the default class name and its styles.
>

</CodeHighlight>
```


You can view all the themes/styles for syntax highlighting here https://highlightjs.org/static/demo/
Just import the stylesheet of your choice.

If your webpack configuration doesn't support importing of `css stylesheets`, Either Google on how to support it or Copy the contents of these stylesheets manually into your css file.
Now we're done with writing code, Let's commit our code and push to GitHub
Run git add -A and then git commit -m "Version 1" and then git push
Now you can open the Repository URL to see your latest committed code, In this case its https://github.com/dhruv-kumar-jha/code-highlight
Step#6: Publishing To NPM
Open terminal and run the command npm publish and you're done.
If this is your first time publishing to npm please signup here https://www.npmjs.com, After signing up, In terminal run npm login to authenticate yourself and then run the npm publish
Also checkout this tutorial https://www.dhruvkumarjha.com/articles/writing-and-publishing-a-simple-javascript-module-to-npm for more info on publishing a package to NPM
If you encounter any issue just let me know.
The package is available at https://www.npmjs.com/package/code-highlight
Step#7: Using the component in Other React Projects/Applications
Let's start by installing this package in our existing react application by running yarn add code-highlight highlight.js
And then you use this component as usual, There's an example below.
'use strict';
import React from 'react';
import { render } from 'react-dom';
import CodeHighlight from 'code-highlight';
import "code-highlight/lib/style.css";
import "highlight.js/styles/xcode.css";
render(
(
<CodeHighlight
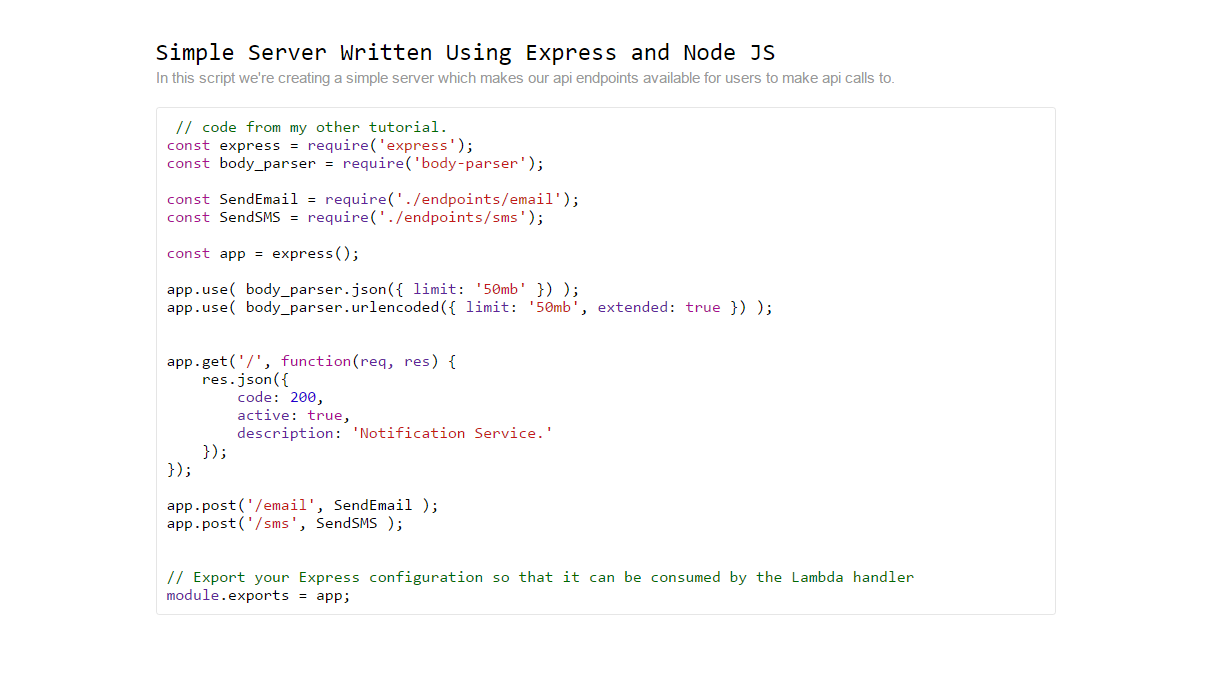
title="Simple Server Written Using Express and Node JS"
description="In this script we're creating a simple server which makes our api endpoints available for users to make api calls to."
>
{` // code from my other tutorial.
const express = require('express');
const body_parser = require('body-parser');
const SendEmail = require('./endpoints/email');
const SendSMS = require('./endpoints/sms');
const app = express();
app.use( body_parser.json({ limit: '50mb' }) );
app.use( body_parser.urlencoded({ limit: '50mb', extended: true }) );
app.get('/', function(req, res) {
res.json({
code: 200,
active: true,
description: 'Notification Service.'
});
});
app.post('/email', SendEmail );
app.post('/sms', SendSMS );
// Export your Express configuration so that it can be consumed by the Lambda handler
module.exports = app;
`}
</CodeHighlight>
),
document.getElementById('root')
);
And the final result looks like
I had fun writing this Tutorial, Hope you had fun reading it as well. Also this website uses this exact same package for Code Highlighting.
See you in other tutorials and articles..