Navigation Links
Building a Static Website Using React JS: Part #1 Project Setup and Website UI
Step#1: What, Why and How
What: We will build a website and simple blog using React JS.
Why: Because although its easy to build anything using React JS, When it comes down to building a website it's difficult., Because websites needs to focus on SEO along with other things and If we're doing everything static this gets complicated fast. (If you're using server then this wont be much of a problem).
How: We will make use of Code Splitting and load only the required scripts, We will generate (pre-rendered) HTML page for every route in our website, This will help us serve content with SEO tags.
Step#2: What is Our End Goal?
This is all good, But it's not as simple as it seems, Atleast it didn't seem simple to me. (but i got it up and running) so Let's get started.
Step#3: What is This Website For?
You can decide to build website for anything you want, For yourself, company, product, services, portfolio, lists, etc, I have decided to focus on my own project.
Whatever you build, The only things that might change are website Pages, Content and the layout. Which does't matter for what we're learning.
Decide and work on how you want your website to look like, what and all pages it should have, etc
Following this example, This is how i want my website to look like
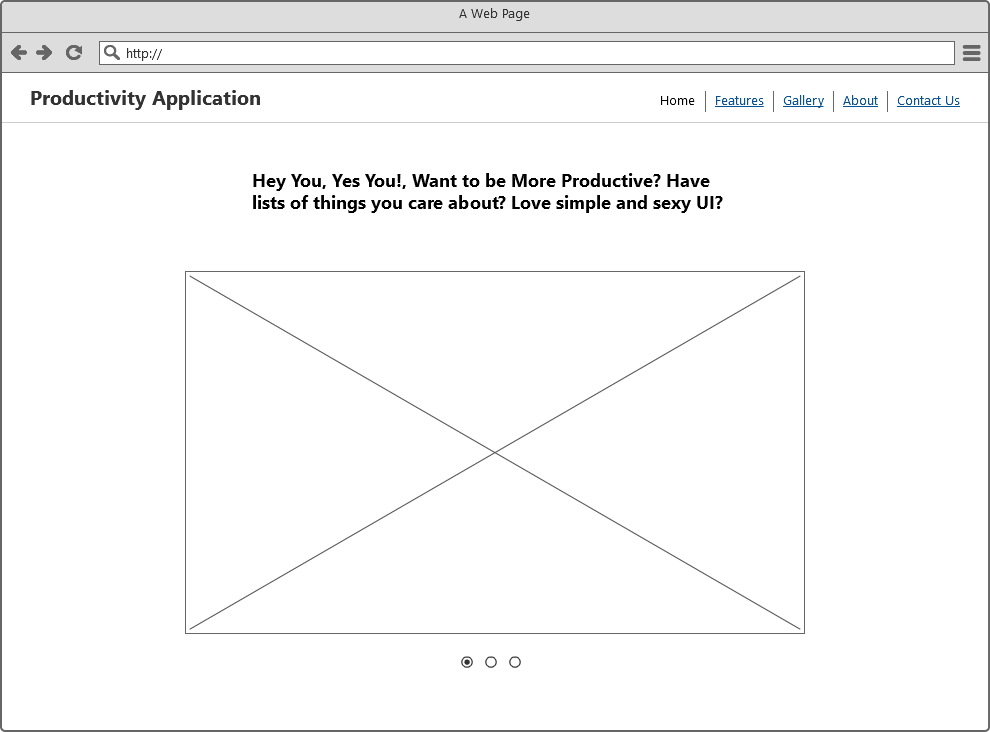
I will add background color, change heading, etc later on but this is the general layout I want for my website.
Step#4: Setting up the Project
Open GitHub and create your project there. This will help us keep track of our source code and in case we screw up.
I created the project and this is the repository url https://github.com/dhruv-kumar-jha/react-static-complete-website
I am going to clone this repository locally by running the command git clone https://github.com/dhruv-kumar-jha/react-static-complete-website.git
After cloning, Open that directory and in terminal run yarn init -y This will create a package.json file with default data.
html pages.This is enough to get started, We will add/install more packages later on if required.
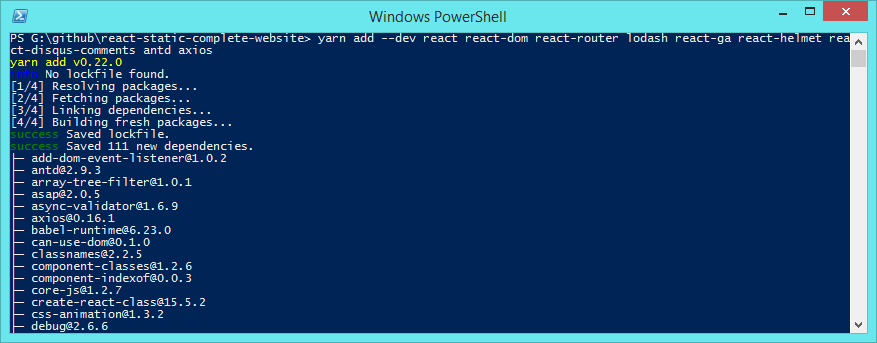
Let's install all these dependencies by running command yarn add --dev react react-dom react-router lodash react-ga react-helmet react-disqus-comments antd axios
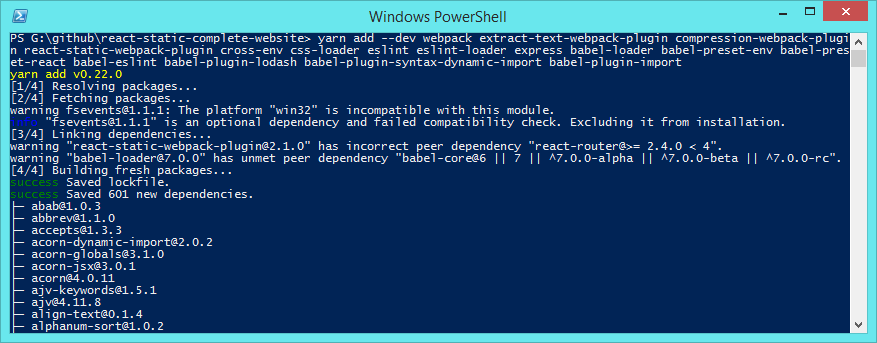
Let's continue installing the rest of these packages, yarn add --dev webpack extract-text-webpack-plugin compression-webpack-plugin react-static-webpack-plugin cross-env css-loader eslint eslint-loader express babel-loader babel-preset-env babel-preset-react babel-eslint babel-plugin-lodash babel-plugin-syntax-dynamic-import babel-plugin-import
Now let's commit our code and push to GitHub, You can see the package.json file at https://github.com/dhruv-kumar-jha/react-static-complete-website/tree/V1.0
Let's start by creating some files, directories and writing some code..
Step#5: Creating Files and Directories
This will be our file and directory structure
Let's commit and push our code again, You can see the files and directories created here https://github.com/dhruv-kumar-jha/react-static-complete-website/tree/V1.1
Step#6: .babelrc and .eslintrc Configuration
Open .babelrc file and add this code.
{
	"presets" : [["env",{ "modules": false }], "react" ],
	"plugins": [
		"lodash",
		[ "import", {
			"libraryName": "antd", "style": "css"
		} ],
		"syntax-dynamic-import"
	]
}
Here we're just telling babel we're using env preset along with react preset and We want to use the plugins lodash, antd and syntax-dynamic-import
Now, Open .eslintrc file and add this code.
{
  "env": {
    "browser": true,
    "node": true,
    "es6": true
  },
  "rules": {
    "quotes": 0,
    "no-trailing-spaces": 0,
    "eol-last": 0,
    "no-unused-vars": 0,
    "no-underscore-dangle": 0,
    "no-alert": 0,
    "no-lone-blocks": 0
  },
  "parser": "babel-eslint",
  "parserOptions": {
    "ecmaVersion": 6,
    "sourceType": "module",
    "allowImportExportEverywhere": true,
    "ecmaFeatures": {
      "modules": true,
      "jsx": true,
      "experimentalObjectRestSpread": true
    }
  },
  "globals": {
    "jQuery": false,
    "$": false
  }
}
I recommend you checkout the full configuration options for this file here http://eslint.org/docs/user-guide/configuring
Step#7: Writing simple Static File Server Using Express JS
express.Open scripts/server.js file and add this code
'use strict';

const express = require('express');
const app = express();
const path = require('path');

// specify the port where you want this server to be available at
app.set( 'port', process.env.PORT || 1001 );

// make the entire contents of public directory accessible
app.use( express.static(
	path.join(__dirname, '../', 'public'),
	{
		// index: false, // don't look for index.html files in sub directories.
		extensions:['html']
	})
);


// for every request made, if the file doesn't exist, return 200.html file.
app.get( '/*', (req, res) => {
	res.sendFile( path.join(__dirname, '../', 'public', '200.html') );
});

app.listen( app.get('port'), function () {
	console.log('Server running at http://localhost:%s', app.get('port'));
});
Running this file node server.js will start our server and serve everything from public directory.
Step#8: Creating Default HTML File Automatically
html-webpack-plugin plugin to create HTML file with the generated scripts file name making it easier to test our website.Run the command yarn add --dev html-webpack-plugin
Now, create a file named 200.ejs in scripts directory. This file will be used as a template by html-webpack-plugin when generating our html file.
Open file scripts/200.ejc and add this code in it
<!doctype html>
<html lang="en">
<head>
	<meta charset="utf-8" />
	<meta name="viewport" content="width=device-width, initial-scale=1, shrink-to-fit=no">
	<meta http-equiv="X-UA-Compatible" content="IE=edge">
	<title>Productivity Application</title>
	<meta name="description" content="Be More Productive">
	<link rel="icon" href="/images/favicon.ico">

	<!-- place all the generated css files here -->
	<% for (var css in htmlWebpackPlugin.files.css) { %>
		<link href="<%= htmlWebpackPlugin.files.css[css] %>" rel="stylesheet">
	<% } %>

</head>
<body>

	<div id="root">
		<div class="component__loading">
			<div class="loading">
				<div class="bar-container">
					<div class="bar"></div>
				</div>
				<p class="info">Loading... Please wait.</p>
			</div>
		</div>
	</div>

	<!-- place all the generated js here -->
	<% for (var chunk in htmlWebpackPlugin.files.chunks) { %>
		<script defer src="<%= htmlWebpackPlugin.files.chunks[chunk].entry %>"></script>
	<% } %>

</body>
</html>
This file makes use of ejs templating syntax which is supported by html-webpack-plugin., All this file does is sets up basic HTML page and its scripts, style tags are added dynamically. (based on the files generated by webpack) so we don't have to worry about adding these manually. (atleast for now)
Step#9: Writing Our Webpack Configuration
Open webpack.config.js file and add this code, Do note we will come back to this file later on and add more code.
'use strict';

const webpack = require('webpack');
const path = require('path');

const BUILD_DIR = path.resolve(__dirname, 'public/scripts');
const APP_DIR = path.resolve(__dirname, 'src');
const PUBLIC_DIR = path.resolve(__dirname, 'public');

const ExtractTextPlugin = require("extract-text-webpack-plugin");
const HTMLWebpackPlugin = require('html-webpack-plugin');
const CompressionPlugin = require("compression-webpack-plugin");
const ReactStaticPlugin = require('react-static-webpack-plugin');


// put all the code of these packages in a single file
const VENDOR_LIBS = [
	'react',
	'react-dom',
	'react-router',
	'react-ga'
];


const WebpackConfig = {

	entry: {
		bundle: APP_DIR + '/app.js', // this is our entry file
		vendor: VENDOR_LIBS // specifying which and all libraries the vendor file will contain
	},

	output: {
		path: PUBLIC_DIR, // output directory

		// place the generated files in /public/scripts directory and name them accordingly.
		filename: 'scripts/[name].[chunkhash].js',
		// chunk files, place them in /public/scripts directory and name them accordingly.
		chunkFilename: 'scripts/[name].[chunkhash].chunk.js',

		// path where the generated code chunks will be, in our case its the same dir.
		publicPath: '/',
	},


	// include all these modules.
	// these modules will compile our code so we can use it in the browser.
	module: {
		rules: [
			{
				enforce: 'pre',
				test: /.js$/,
				exclude: /node_modules/,
				loader: 'eslint-loader',
				include : APP_DIR
			},
			{
				loader: 'babel-loader',
				test: /.js$/,
				exclude: /node_modules/,
				include : APP_DIR,
				options: {
					presets: [ ['env',{ modules: false }], 'react' ],
					plugins: [ 'lodash', [ 'import', { libraryName: 'antd', style: 'css' } ], 'syntax-dynamic-import' ]
				}
			},
			{
				use: ExtractTextPlugin.extract({
					use: 'css-loader',
				}),
				test: /.css$/
			},
			{
				loader: 'json-loader',
				test: /.json$/
			}
		],
	},


	// load all these plugins
	plugins: [

		new ExtractTextPlugin({
			filename: 'styles.css',
			allChunks: true
		}),

		new webpack.optimize.CommonsChunkPlugin({
			names: ['vendor', 'manifest'],
			minChunks: Infinity,
		}),

		new HTMLWebpackPlugin({
			inject: false,
			filename: '200.html',
			template: 'scripts/200.ejs',
			minify: {
				collapseBooleanAttributes: true,
				removeComments: true,
				collapseWhitespace: true,
			}
		}),

	],

	// this will resolve the path in the components we will write
	// this will help us get rid of the ugly  Ex: '../../filetoinclude' syntax and we can just say app/file to import it.
	resolve: {
		alias: {
			app: APP_DIR,
			public: PUBLIC_DIR,
		},
		extensions: [ '.js', '.json' ]
	},

};

module.exports = WebpackConfig;
Step#10: Adding Our First Route
Open src/routes.js and add this code.
'use strict';

import DynamicImport from 'app/components/DynamicImport';

const WebsiteRoutes = {
	childRoutes: [

		{
			path: '/',
			indexRoute: {
				getComponent(location, cb) {
					DynamicImport(
						import(/* webpackChunkName: "home" */'app/content/Home'),
						cb,
						'home'
					);
				}
			},
		},


	],
};

export default WebsiteRoutes;
Few things to note here:
Using import('app/content/Home') tells webpack to create a new file i..e split the code for this route.
We have used a new component called DynamicImport which we haven't written yet., But why use a component here? It will work without wrapping it within another component, So Why?
Also note the line import DynamicImport from 'app/components/DynamicImport'; but there is not app directory, This works because in our webpack.config.js file we created a resolve object with alias, That tells webpack app/components/DynamicImport just means src/components/DynamicImport
Step#11: Why DynamicImport component?
Depending on the size of the javascript file we're loading, it might take some time for it to be loaded and theres no way for user to know we're loading anything.. so the website might seem unresponsive to them, This is very bad.
What this component will do is, Whenever a script is loading this will show a spinner visually telling the user that we're processing their request., When the script is loaded the spinner will disappear and the user can see the expected response.
Now let's Create a new directory named src/components and add a new file named DynamicImport.js there.
Add this code in src/components/DynamicImport.js file, All this code does is it checks if the file is already loaded or not and displays a loading message accordingly.
'use strict';

import React from 'react';
import { message } from 'antd';

// empty scripts object, this keeps track of all the scripts that have been loaded dynamically.
const scripts = {};


const DynamicImport = ( component, callback, script_name ) => {

	const allPreviousLoaded = Object.keys(scripts).every( (k) => { return scripts[k] === true });


	if ( ! scripts[script_name] ) {
		scripts[script_name] = false;
	}

	if ( scripts[script_name] && scripts[script_name] === true ) {
		return component.then( response => {
			return callback( null, response.default );
		});
	}


	const allLoaded = Object.keys(scripts).every( (k) => { return scripts[k] === true });
	let loading_message = '';

	if ( allPreviousLoaded ) { loading_message = message.loading( 'Loading content...', 0); }

	return component.then( response => {
		if ( allPreviousLoaded ) { loading_message(); }
		scripts[script_name] = true;
		return callback( null, response.default );
	})
	.catch( error => {
		throw new Error(`Component loading failed: ${error}`);
	});

}

export default DynamicImport;
Step#12: Putting Everything Together
app.js file and adding few scripts in our package.json file. Open src/app.js file and add this code
'use strict';

import React from 'react';
import { render } from 'react-dom';

import { Router, browserHistory } from 'react-router';
import WebsiteRoutes from './routes';

const AppLayout = (props) => {
	return (
		<div>
			{ props.children }
		</div>
	)
}

render(
	(
        <AppLayout>
            <Router history={ browserHistory } routes={ WebsiteRoutes } />
        </AppLayout>
	),
	document.getElementById('root')
);
Open package.json file and add this code
"scripts": {
	"start": "node scripts/server.js",
	"watch": "cross-env NODE_ENV=development webpack -w",
	"build": "cross-env NODE_ENV=production webpack -p"
},
This will allow us to run our scripts, code very easily.
Let's create a file named src/content/Home.js and add this code in it
'use strict';

import React from 'react';
import { Link } from 'react-router';

const Home = (props) => {

    return (
        <div>

            <header>

                <div className="title"><Link to="/">Productivity Application</Link></a></div>

                <nav>
                    <Link to="/">Home</Link>
                    <Link to="/features">Features</Link>
                    <Link to="/gallery">Gallery</Link>
                    <Link to="/about">About Us</Link>
                    <Link to="/contact">Contact Us</Link>
                </nav>

            </header>

            <div>
                <h1>HOME PAGE</h1>
                <p>Welcome to Productivity Application Home Page.</p>
            </div>

        </div>
    );

}

export default Home;
Step#13: Mistakes and Fixes
babel-coreyarn add --dev babel-coreAlso when we installed react-router It installed the latest version of it i...e 4.1.1, We need previous version.
yarn add --dev react-router@3.0.3Step#14: Testing
Open terminal and run command yarn start, You should see the ip and port where the local server is running, Open that in Browser. In this case its http://localhost:1001
Open another terminal and run command yarn watch, After you see the logs refresh the URL again and you should see something similar to this.

Lets add this line in our .gitignore file
public
And commit the code until this point and push it to GitHub.
Conclusion
You an very easily use everything upto this point for any react based projects you do., This can serve as a good Boilerplate.
You can see the updated code here https://github.com/dhruv-kumar-jha/react-static-complete-website/tree/V2.0
In the upcoming Tutorial(s) things will speed up a lot because of all the groundwork we did in this.
If you want to share anything just comment below.